
The first step of in vivo two-photon imaging in awake mice is often a clean cranial window surgery (craniotomy) paired with headring implantation. Whether the window is optically clear and the headring firmly mounted directly determines the success of all subsequent imaging. This article walks through the complete workflow—from pre-operative preparation to post-operative care—as an illustrated reference for researchers.
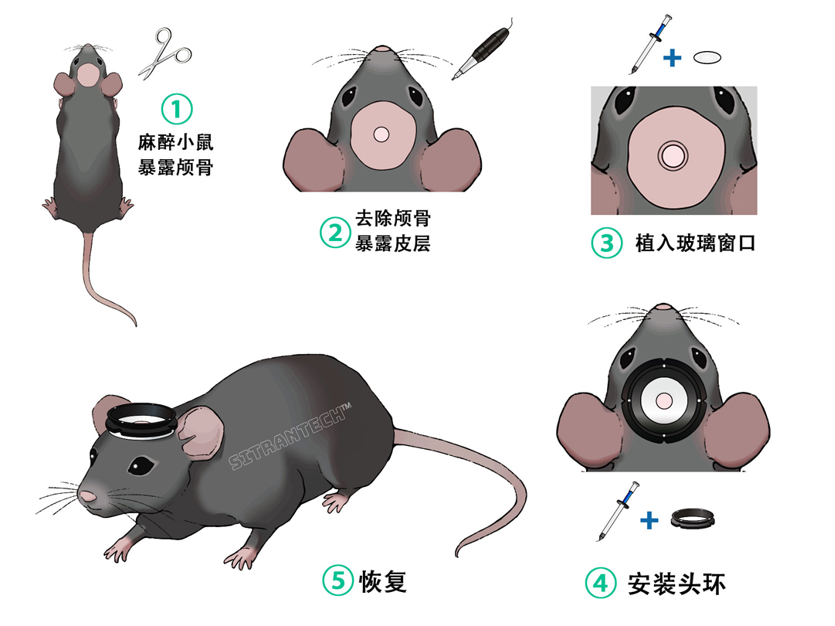
Overview of the cranial window surgery workflow
Pre-Operative Preparation (Instruments & Consumables)
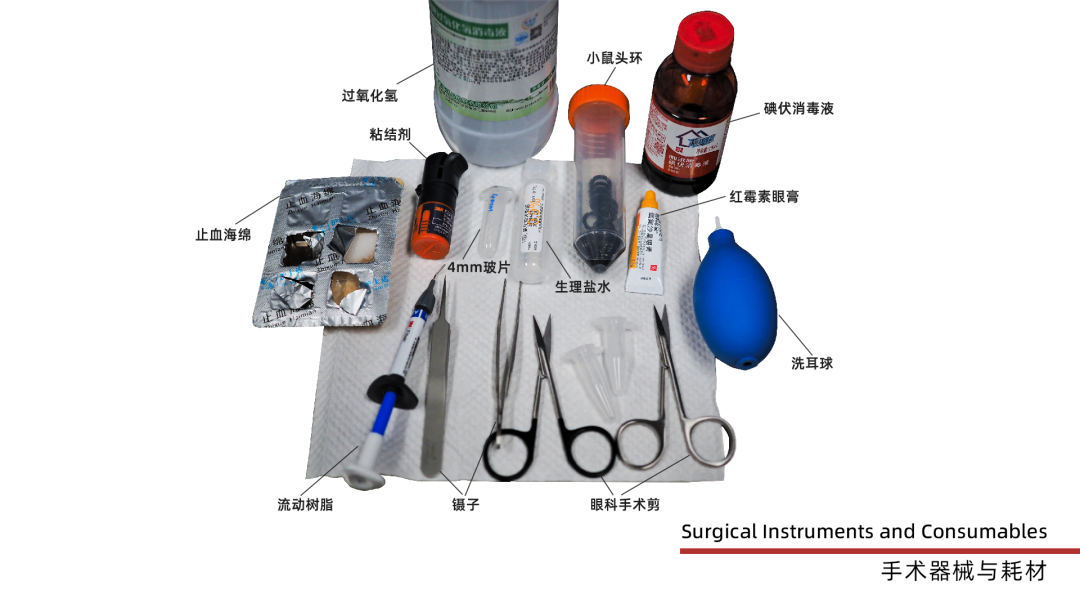
Instruments and consumables for pre-operative preparation
Common instruments: stereotaxic frame / ear bars, anesthesia mask, ophthalmic surgical scissors, ophthalmic forceps, cranial drill (0.5 mm burr), rubber-bulb blower, blue-light curing lamp, ultrasonic cleaner.
Common consumables: erythromycin eye ointment, iodophor disinfectant, hydrogen peroxide solution, physiological saline, sterile cotton swabs/cotton, 3M adhesive and flowable resin, hemostatic sponge, round coverslip, headring, ketoprofen, gentamicin.
Detailed Surgical Steps
Step 1: Secure the Anesthetized Mouse
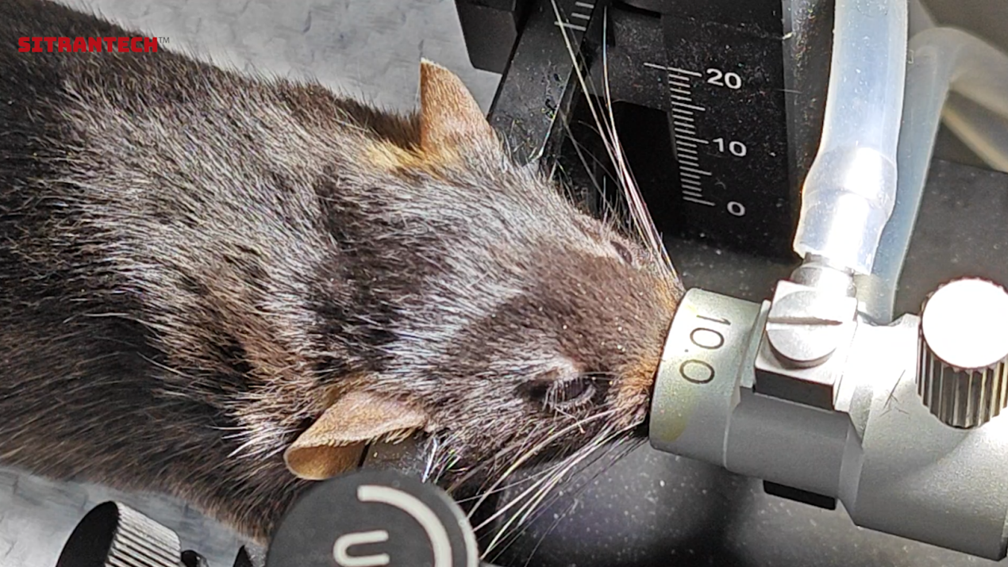
- Hook the teeth of the anesthetized mouse onto the anesthesia mask on the surgical stage.
- Use the ear bars to fix the mouse's head, and adjust its position by rotating the knobs in different directions.
- Check the head fixation with forceps; if there is no obvious movement, proceed to the next step.
Step 2: Apply Eye Ointment to Protect the Eyes
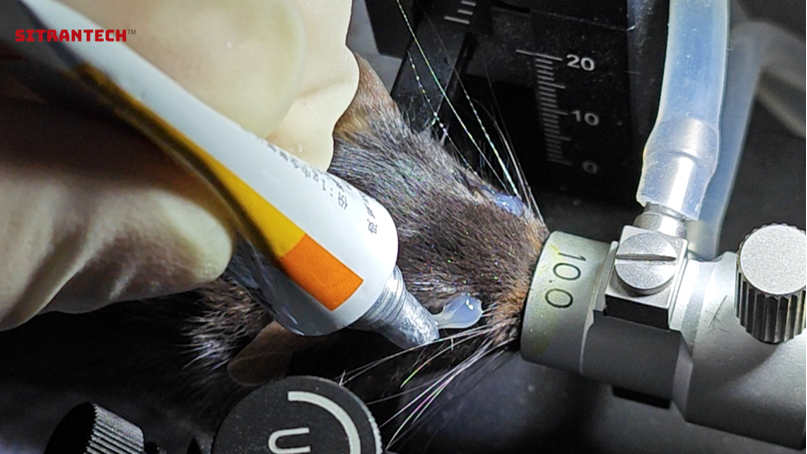
- Apply erythromycin eye ointment to the mouse's eyes to protect them during the subsequent steps.
Step 3: Remove the Fur
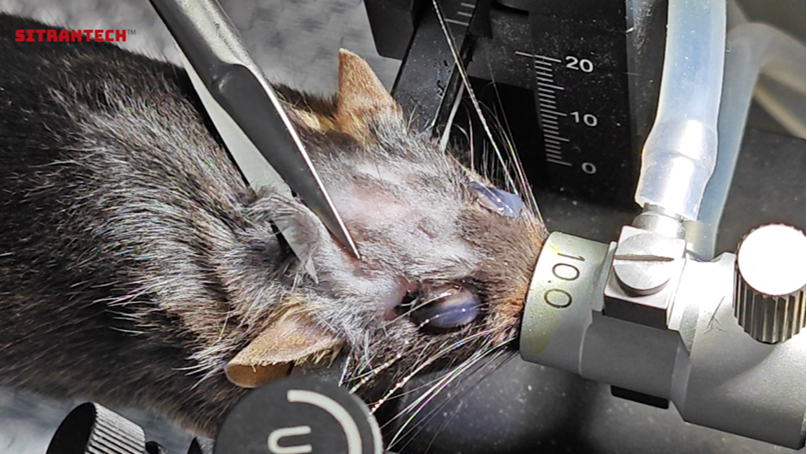
- Carefully trim the fur on top of the mouse's head with ophthalmic surgical scissors, taking care not to cut near the eyes.
Step 4: Disinfect with Iodophor
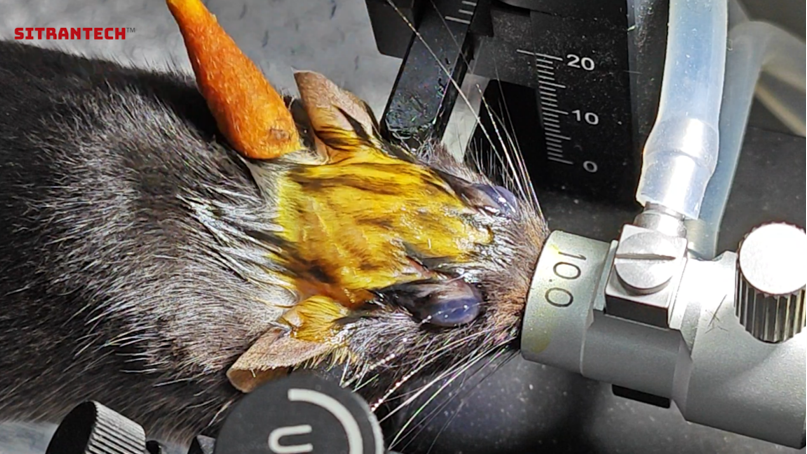
- Disinfect the top of the mouse's head with iodophor solution.
Step 5: Incise the Scalp to Expose the Skull
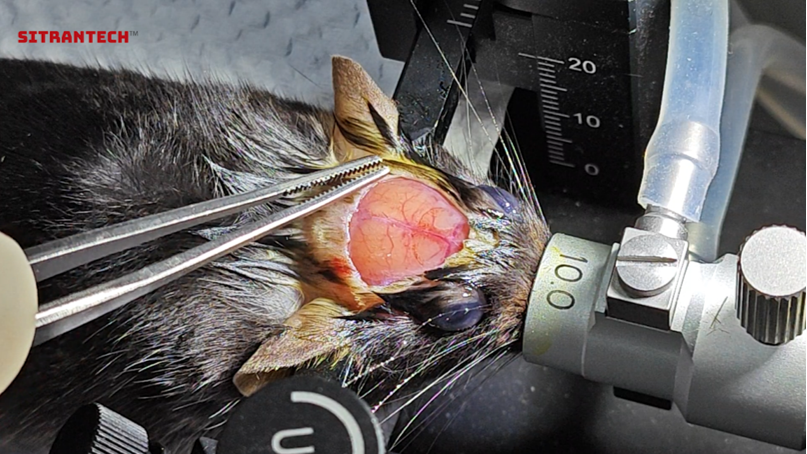
- Using a separate clean pair of surgical scissors together with forceps, first cut an opening in the middle of the head, then cut an arc toward each side above the eyes to expose the entire skull.
- After exposing the skull, check whether it is relatively level, then perform a secondary adjustment.
Step 6: Etch the Periosteum with Hydrogen Peroxide
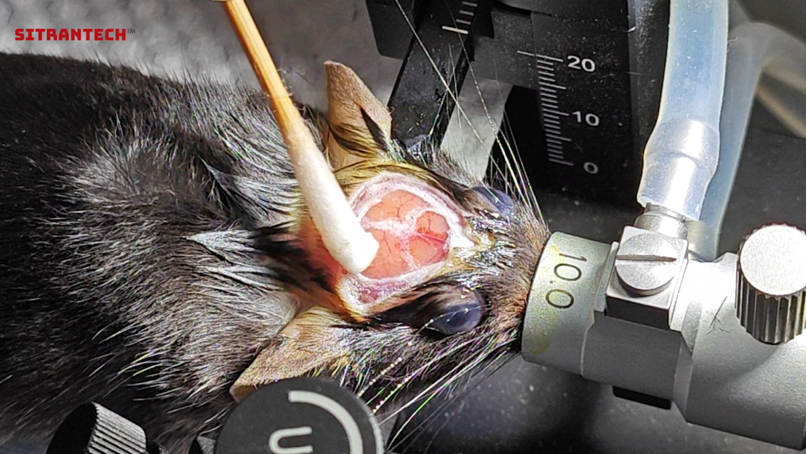
- Dip a cotton swab in hydrogen peroxide solution and carefully apply it to the skull. Wait 5–10 seconds, then rinse off the excess with physiological saline.
Step 7: Remove the Periosteum
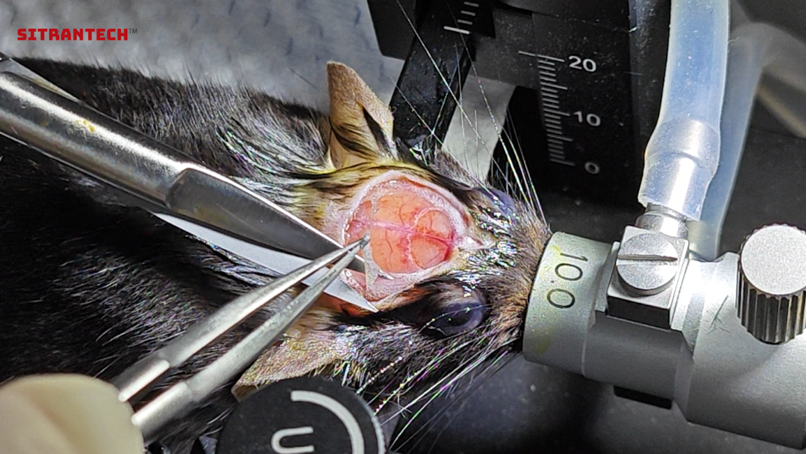
- Carefully remove the periosteum with surgical scissors and forceps; then use forceps holding cotton to clean the skull surface, and dry it with air from the rubber-bulb blower.
Step 8: Open the Window with a Cranial Drill
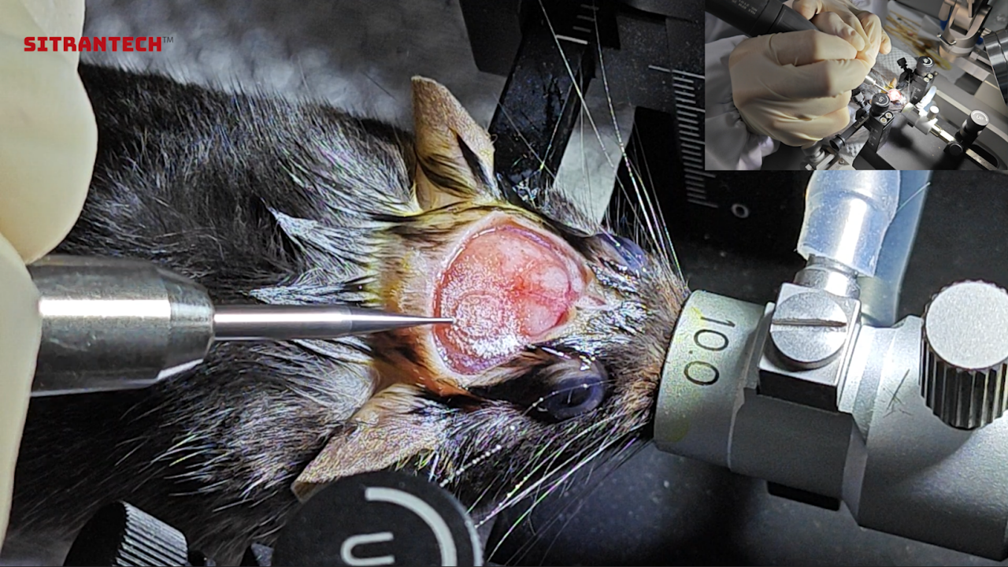
- Use a 0.5 mm burr at medium speed to begin grinding the window position.
- First grind the outline of the window—slightly smaller than the coverslip diameter—then deepen the outline ring by ring.
- Stay focused during grinding; you may use both hands to keep movements stable, blowing away bone debris with the blower as needed, and keep the window moist with physiological saline to prevent overheating.
- When gently pressing the window with the burr reveals significant loosening, stop grinding and prepare for the next step.
Step 9: Remove the Skull Flap
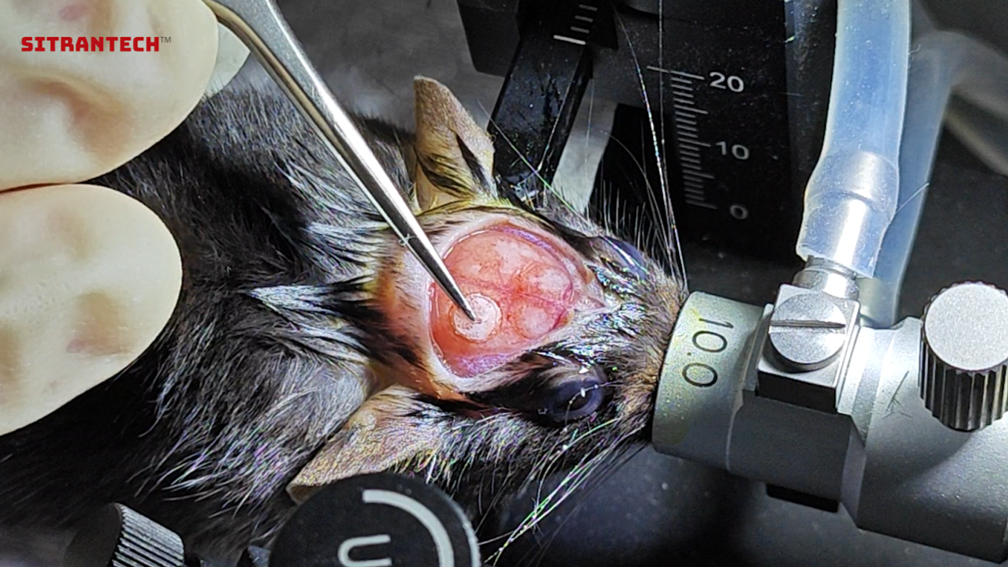
- Moisten cotton with physiological saline to clean bone debris and wet the window.
- Then dry the saline with dry cotton and again blow the skull surface dry with the blower.
- Using forceps along the ground outline of the window, gently pry up and slowly lift off the skull flap and remove it.
- Place a hemostatic sponge on the window to stop bleeding while monitoring blood loss and keeping the skull surface clean. Once the window's vessels stop oozing, proceed to the next step.
Step 10: Cover the Skull with Adhesive
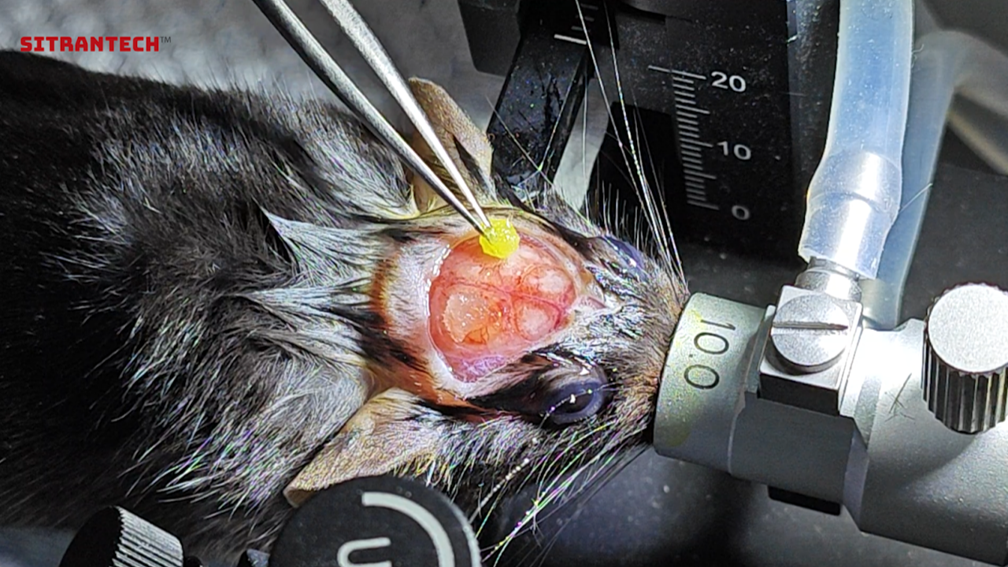
- Apply 3M adhesive evenly over the mouse's skull, making sure to cover it completely. The adhesive serves as a base coat, bonding the skull and resin more firmly.
- Then cure with a blue-light curing lamp for 20 seconds until the adhesive is fully cured before proceeding.
Step 11: Fix the Window Coverslip
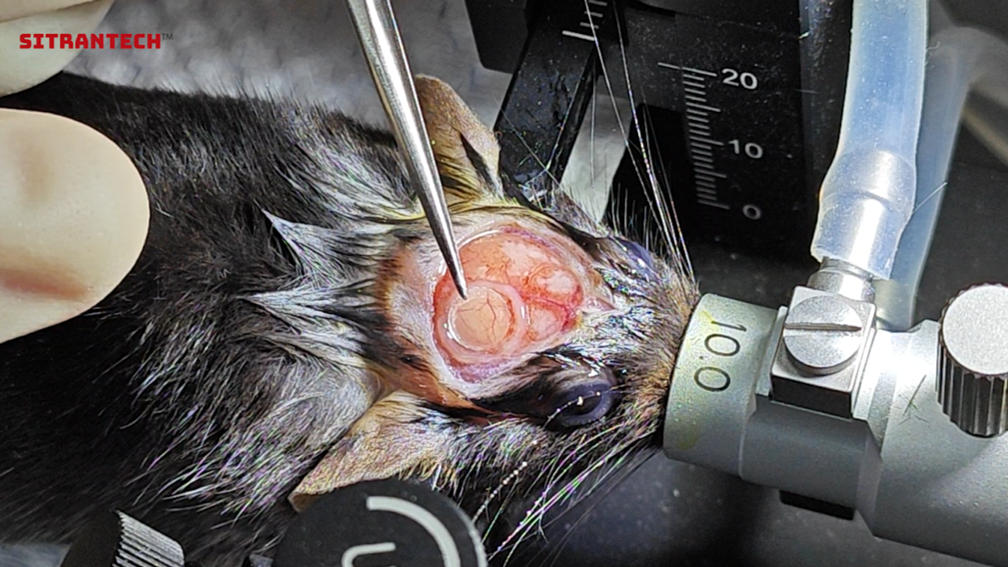
- First, gently apply an appropriate amount of 3M flowable resin around the window (an outline slightly larger than the coverslip diameter); too much resin may seep into the window and cause surgical failure.
- Place the coverslip on the window, adjust its position, and gently press to locate it with forceps.
- Then cure the 3M flowable resin with the blue-light lamp for 20 seconds to preliminarily fix the coverslip.
- Next, cover the perimeter of the coverslip surface with a layer of 3M flowable resin so the coverslip is sandwiched between two resin layers; cure for 20 seconds until fully set, completing the coverslip fixation.
Step 12: Mount the Headring
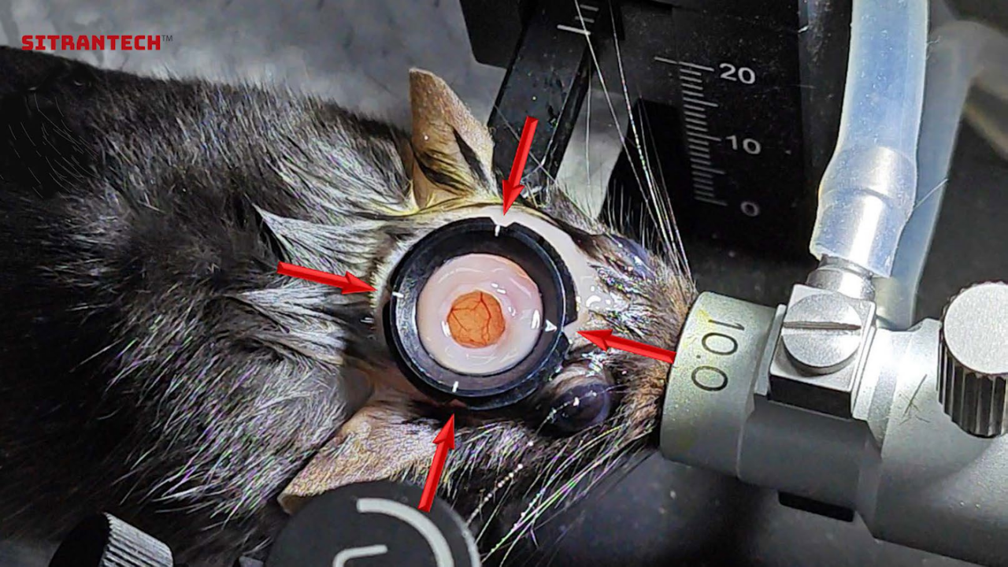
- First, completely cover the dry skull surface with 3M flowable resin.
- Use forceps to place the headring onto the 3M flowable resin. Note the orientation of the headring's 4 notches, and adjust the base of the headring to be as parallel as possible to the window coverslip—otherwise it may affect imaging quality under the microscope.
- Once the final position of the headring is determined, cure the 3M flowable resin with the blue-light lamp for 20 seconds until fully set.
- Apply a layer of 3M flowable resin over and around the headring and cure with the blue-light lamp for 20 seconds to reinforce the fixation. Finally, remove the fixed mouse to complete the entire surgery.
· Never let resin touch the window.
· Keep resin off the notches and the beveled slots of the headring.
· The notch orientation affects the mouse's final fixation posture; ideally keep one notch aligned with the mouse's head direction.
· Resin on the notches or slots will impair the headring clamping when later mounted on the rig.
Appendix: Infection Prevention & Post-Operative Care
- Keep the experimental environment relatively isolated and enclosed.
- Sterilize the surgical instruments.
- Use sterile cotton swabs and sterile physiological saline.
- Ultrasonically clean the coverslips and headrings, then soak them in alcohol.
- After opening the window, inject ketoprofen and gentamicin for anti-inflammatory purposes.
- Disinfect daily with a UV lamp after surgery.
The above content is for research and educational reference only; corrections and additions are welcome. For detailed procedure videos or related materials, please contact us via the details at the bottom of this page.
About Us
SITRANTECH has been deeply engaged in biomedical engineering, collaborating closely with front-line laboratories for over five years. We provide the neuroscience, behavioral, and optogenetics communities with: awake mouse head-fixed treadmill systems, custom experiments combining head-fixation with behavioral setups, cranial window surgery consumables and accessories, and equipment customization and technical consulting services. Our mission is simple: to empower scientific discovery through precision engineering and bring innovation from the lab into real-world application.
Originally published on SITRANTECH WeChat Official Account Special thanks: this cranial window surgery tutorial was provided by our partner laboratory, LNHD.


